Tuesday, January 25, 2011

Tutorial on Bagel Making & Chicken Salad Recipe


I am enjoying a couple days with my Mama and we decided to make bagels and chicken salad.  She made the Rotisserie chicken and I made the bagels.  Today I am going to show you how to make both. We'll start with the bagels. I have posted on bagels before but it was using a sourdough starter, this is for those of you without starters. :)


Boiled Bagels

Ingredients

  • 4 1/4 cups all-purpose flour
  • 2 (.25 ounce) packages active dry yeast
  • 1 1/2 cups warm water (110 degrees F/45 degrees C)
  • 3 tablespoons white sugar
  • 1 tablespoon salt
  • 1 tablespoon white sugar

Directions

  1. In large bowl, combine 1-1/2 cups flour and yeast. Mix water, 3 tablespoons sugar and salt together, and add to the dry ingredients. Beat with a mixer for half a minute at a low speed, scraping the sides of the bowl clean. Beat at a higher speed for 3 minutes. Then, by hand, mix in enough flour to make a moderately stiff dough.
  2. Turn out onto a lightly floured surface and knead until smooth and elastic (8-10 minutes). Cover, let rest for 15 minutes.
  3. Cut into 12 portions, shape into smooth balls. Poke a hole in the center with your finger, and gently enlarge the hole while working the bagel into a uniform shape. Cover, let rise 20 minutes.

  1. Meanwhile, start a gallon of water boiling. Put 1 tablespoon of sugar in it, mix it around a bit. Reduce to simmering.

  1. When the bagels are ready, put 4 or 5 bagels into the water, and cook 7 minutes, turning once. Drain them. Place on a greased baking sheet, and bake at 375 degrees F (190 degrees C) for 30 to 35 minutes. Remove from oven, eat hot or cold.

  1. Broiling option: For a glossier surface, place raised bagels on an ungreased baking sheet prior to boiling them. Broil them five inches from heat for 1 to 1-1/2 minutes on each side. Then put them into the hot water to be boiled as above. Note: do not bake broiled bagels as long as non-broiled ones, 25 minutes should be long enough.

(My Notes: I like to put 1 Tablespoon of molasses in my boiling water, instead of sugar.  Makes for a very pretty bagel. Also right before I bake them, I sprinkled them with sesame seeds and parsley.  We sliced them in half and filled them with our chicken salad found below.


First we washed a small chicken.


Then we sprinkled on both sides with garlic salt, salt, season salt & pepper.


We placed it on the spit and then cook it in the Baby George Rotisserie.


We cooked it at 180 degrees for 1-1/2 hours or until tender.


Mom cut off all the meat and now we can make our chicken salad.


Grapes sliced all ready to go! Keeping the kiddos out of them was the challenge. :)


Marie's Chicken Salad

1 rotisserie chicken cut in small pieces (if you are in a hurry you could pick up a rotisserie chicken from the deli) :)
3/4 cup plus 2 Tablespoons Miracle Whip
1-1/2 Tablespoons lemon juice
1-1/2 to 2 cups of halved red grapes
Sprinkle to your taste, season salt, garlic salt, onion salt, and pepper.

Mix all together and serve on warm bagel.  The men had been working all morning and they were a big hit with them!!!


My lovely Mama enjoying the yumminess. :)


Busy Mom's Tips Tuesday Blog Hop


Creations by Kara


Monday, January 24, 2011

Line Drying Laundry


I love hanging my clothes on the line!!! I am really good about doing it in the spring/summer, but when winter would come along I would use the dryer.  In the past I have went without both a washer and a dryer just to see if I could do it! :)  I lasted 3 months and I was ever so thankful for a washing machine again. I found one on craigslist for $25, and so far it has lasted a couple of years. I think I will go back one day to hand washing, but I would much prefer to have one of these!!!  Instructions to make these can be found @ HomelessDave.com


I decided to get a dryer too, it was $25, but a couple of months ago a piece came off inside of it and clothes will get stuck in it, it buts black stains on them or even holes.  And while I like the convenience of a dryer, I do not have the funds to purchase another one yet.  Not sure if I want too, I sure love the money I save not using a dryer!!!

So this is what I did:
1.  I found a drying rack at a thrift store for $2.00.  It is not fancy, and maybe a little flimsy but it works!!!!


2. Before I got the nice tall drying rack on wheels, I would hang all adult clothing on hangers and hang them up in the bathroom shower rod to dry.
3. Then a dear friend gave me the handy drying rack. I rearranged my area by the laundry room and placed these two drying racks near the washer and near the window where the sun shines through.
4. I went through all of our laundry and gave away about half of it.  When you are not using a dryer at all to dry your clothing it takes a good 12-24 hours to dry a load indoors.  By minimizing our amount of clothing I can stay on top of our laundry much easier.
5. I also keep the children's dressers near by, as you can see in the picture, so when the clothes are dry, I simply fold them and place them in their drawers. It makes for a pretty fast process.

The basket full of clothes are clean ones I need to put away.  I really do enjoy hanging my clothing to dry versus using a dryer.  It is very peaceful to me. What is your laundry set-up? I'd love to know!!! :)

My Grandma has one of these hanging drying racks, she loves it to hang underwear and socks from, she keeps  it right by the washing machine. When I did not have a washer or dryer I used one of these and it really helped, I think I'll have to get one again!!!


Sunday, January 23, 2011

New! Meaningful Mondays


Welcome to Meaningful Mondays by the Cottage Homestead. I am very excited, this is the first time I have done something like this, I enjoy linking up to other awesome blogs and thought I'd try this myself. So if you see some glitches, bear with me!!! :)

This is a place you can link up and share how you are making your Monday Meaningful. Monday's are hard sometimes, a fresh new week with new challenges arising as well!

Meaningful Mondays is a place of encouragement, if your Monday is not going quite as planned  or desired.  Please share below using the Linky Tool how you are going to make your Monday a Meaningful one!!!

If you so desire to write a post on your blog about it and then link up here.  You can find my button for Meaningful Mondays on the right with the html code below it. If you please, be sure to add the button which will link back to here. :)

Feel free to comment here, and share via Facebook, let's make it a Meaningful Monday.


Beatitudes for a Homemaker

Blessed is she whose daily tasks are a labor of love; for her willing hands and happy heart translate duty into privilege; and her labor becomes a service to God and all mankind.

Blessed is she who opens the door to welcome both stranger and well-loved friend; for gracious hospitality is a test of brotherly love.

Blessed is she who mends stockings and toys and broken hearts; for her understanding is a balm to humanity.

Blessed is she who scours, for well she knows that cleanliness is one expression of godliness.

Blessed is she whom children love; for the love of a child is more to be called than fortune or fame.

Blessed is she who sings at her work; for music lightens the heaviest load and brightens the dullest chore.

Blessed is she who dusts away doubt and fear and sweeps out the cobwebs of confusion for her faith will triumph over all adversity.

Blessed is she who serves laughter and smiles with every meal; for her buoyancy of spirit is an aid to mental and physical digestion.

Blessed is she who preserves the sanctity of the Christian home; for hers is a sacred trust that crowns her with dignity.


Wednesday, January 19, 2011

Homemade Toothpaste Recipe


Today I made homemade deodorant and while I shared that on the cottage homestead's facebook page, an amazing friend of mine asked if made toothpaste too.  Huh! I hadn't even thought of it, I mean I've used just baking soda before or just peroxide to whiten those pearly babies, but have never made actual paste.

So I put the Google to work and happily stumbled upon Pioneer Thinking, a website I need to explore a little more!  While I was devoted to my toothpaste search in the back of my mind I'm thinking, I probably won't be able to make this today, there's no way I'll have everything I need in my cabinets. I WAS WRONG!!!

They have a recipe for  homemade mouthwash too, but I'll need to get Vodka first. I already want to get some to make homemade vanilla............ that would be glorious.  I just don't want to go out and buy the stuff!!! . :)

Mint Toothpaste Recipe

Ingredients:
  • 6 teaspoons baking soda
  • 1/3 teaspoon salt
  • 4 teaspoons glycerin
  • 15 drops peppermint or wintergreen extract
Directions: Mix thoroughly. Should be a tooth paste consistency. Store in a container. You'll be surprised with how fresh your mouth feels.

So here it is simply 4 ingredients, the only reason I had glycerin on hand was because I used it to make homemade dog shampoo a while back.
I also tripled the recipe.
Very easy to mix together, blends well.
As soon as I got it mixed up, I persuaded hubby into going to the bathroom with me to "brush" together.  If you have ever had baking soda in your mouth you will be prepared for the taste that it has, the salt adds even more saltiness, mixed with the peppermint it is quite unusual.
However my teeth looked and felt very clean and my mouth felt refreshed long after I had brushed.  And I know EXACTLY what is in my toothpaste!!! I like that.
I put it in a left over container for now but today I was thinking what could people but this in who have large families, so it is easily accessible for children?  How about a plastic ketchup bottle, the kind restaurants have sitting at the tables, I think you can buy those at Dollar General or Wal-Mart.


Everybody's doing it...Homemade Deodorant


Maybe it's just me, but everywhere I look people are making homemade deodorant. When I read about just how easy it is to make the stuff......well I certainly couldn't be left out. No wonder...."everybody's doing it!!!"  :)

Natural deodorant is really important to me.  Dad raised us to not use the stuff with aluminum in it, we always used "the rock" as we called it, the crystal rock. And yes it works, but it always causes my pits to get dry and itchy. I have really sensitive skin.

And then I have used all the natural brands, and while they kind of work they are pricey!!!  The last one I used was some natural stuff from Tom's of Maine.....I don't think it worked at all. Hmmmmm....maybe that's why I haven't seen any of my friends lately!!! :)

This is one of those recipes where you pretty much have everything on hand too!! How cool is that?

I want to give a special thanks to Homestead Revival for sharing easy instructions on making it!!!


You can find her post on it here


What you will need:


And below you can see the recipe in my pic, it's that easy.
(I doubled the recipe for our family)

1/4 c. baking soda, 1/4 c. cornstarch, 5-6 Tablespoons coconut oil

Before you mix these 3 ingredients together if you like add 5-20 drops of tea tree oil, I used 25 drops of lavender oil.

It says to use a mixer, and since I don't own one I used my hands. I'm kind of afraid of electrical appliances, I'm not sure why but they scare me.  Even blenders. Okay I hope your laughing now that I've confessed this little idiosyncrasy!!!
I mixed this stuff with my hands and it was FUN!!! And it moisturized my hands in the process (boy they needed it)


And of-course I can's have deodorant without in being in a pretty little container, I used a pint jar and added a floral label to the lid.


It even makes good decor for my bathroom shelf!!!!


So that's it......hope you enjoy making yours. And as I read on the Homestead Revival blog it only takes a very little bit!!!

It's here!!! IT'S HERE!!!!!!


That's right! My Baker Creek Heirloom Seeds catalog arrived in the mail yesterday, and I am in love again. :) Just kidding hubby!  It's more like a magazine chock full of so much interesting detail, information, quotes, recipes and more!!!

You can request your copy or shop their online store here.

Speaking of magazine, they do offer one.  It is $12.00 a year.  You can find it here


Two of my friends introduced me to Baker Creek last year.  And I was amazed at what this company has accomplished!!!! It's truly fascinating.  The other amazing part.......... they are in Mansfield, MO....a stones throw from us.  Every spring, summer, and fall they hold a Bakersville Piloneer Village Heritage Day Festival.........I truly cannot wait to go!!!

They even have a restaurant where you can enjoy a hearty meal during the festival, it is an Asian-themed vegetarian restaurant with a very historic atmosphere.  What I found unique is the restaurant is run by donations only, so all guests can afford to dine.  

You will love the catalog and all the amazing heirloom varieties, it is more like a work of ART!!!

My neighbor friend started several of their seeds indoors a couple of springs ago, and shared with me, and we loved them!!!  Now I just have to decide which varieties I want, so many unique ones to choose from.....this is going to be FUN!!! :)


Tuesday, January 18, 2011

Flourless Red Velvet Cake

 Well I have accomplished two firsts tonight: 1. I made a red velvet cake and 2. a flourless cake.
The process was unique and fun and I really appreciated the flavor and texture. I was inspired through the Mrs. Southern Bride Blog and needless to say I do not believe I can create a picture as alluring as the one she has shown of her red velvet bliss cake. :)

Oh yes! And I would like to add that I ran out of red food coloring so mine looks purple...guess you could call it a Magenta Velvet Cake. ha ha ha But here it is anyways.


Here is the recipe as found on her blog

(Flourless) Red Velvet Cake
(Source: Mrs. Southern Bride Blog)

Ingredients:
1/2 cup water
1/4 teaspoon salt
3/4 cup white sugar
1/2 Cup Bittersweet Chocolate Chips
1 cup unsalted butter
6 eggs
1 teaspoon Vanilla
1 teaspoon of White Vinegar
2 teaspoons of Red Food Coloring

1. Preheat oven to 300 degrees F (150 degrees C). Grease one 10 inch round cake pan and set aside.
2. In a small saucepan over medium heat combine the water, salt and sugar. Stir until completely dissolved and set aside.
3. In the microwave melt chocolate chips in 30 second increments, and stir until melted.
4. Cut the butter into pieces and beat the butter into the chocolate in your mixer. Slowly add the hot sugar-water, and beat in the eggs, one at a time. Add the vanilla, vinegar, and red food coloring until well blended.
5. Pour the batter into the prepared pan. Have a pan larger than the cake pan ready, put the cake pan in the larger pan and fill the pan with boiling water halfway up the sides of the cake pan.
6. Bake cake in the water bath at 300 degrees for 45 minutes. The center will still look wet. Chill cake for 2-3 hours in the freezer.

For the Glaze:

3 Tablespoons of Milk
3 Tablespoons of Cream Cheese
3-4 Tablespoons of Powdered Sugar
1/2 Teaspoon of Vanilla

Mix ingredients, until a creamy paste forms. Pour over individual slices of the cake. Enjoy!

(My Notes:  I did not have bittersweet so I used semi-sweet chocolate chips.  Also for the glaze I used 2 oz. of cream cheese and about 8-10 tablespoons of powdered sugar.)

What a wonderful treat it was!!!!


Creations by Kara


Pinto "Painted" Beans: 101


I grew up on beans.  Beans and cornbread. Not only were they cheap but my Dad loved them, always wanted Mom to keep a pot of them going on the stove.  Seems like Dad knew what he was doing.  Beans are good for you!!!  

According to the World's Healthiest Foods

When you "Combine the creamy pink texture of pinto beans with a whole grain such as brown rice.....you have a virtually fat-free high quality protein meal. 

Pinto beans have a beige background strewn with reddish brown splashes of color. They are like little painted canvases, á la Jackson Pollack; hence their name "pinto," which in Spanish means "painted." When cooked, their colored splotches disappear, and they become a beautiful pink color. 

Pinto beans are a very good source of cholesterol-lowering fiber, as are most other beans. In addition to lowering cholesterol, pinto beans' high fiber content prevents blood sugar levels from rising too rapidly after a meal, making these beans an especially good choice for individuals with diabetes, insulin resistance or hypoglycemia. 
But this is far from all pinto beans have to offer. Pinto beans are also an excellent source of molybdenum, a very good source of folate and manganese, and a good source of protein and vitamin B1 as well as the minerals phosphorus, iron, magnesium, potassium, and copper."

You can read more about what they have to say about beans by clicking here.


So now that we know beans really are good for us, and as we all know budget friendly let me share with you my basic recipe for a "Pot-o-Beans"

Marie's Pot-o-Beans
(Serves 4-5)

2 to 2-1/2 cups dried pinto beans
7-9 cups water
5-6 Tablespoons of Knorr beef bouillon 

1. First measure out your beans and scoop a handful on a plate. Look through the beans for debris, bad beans, etc. Pick these out and throw them away.  
2. After you have sorted through all the beans put them in a small pot, run some warm water on them and swish them around with your hand to "clean" them.  After you have done this, strain the beans in a strainer and rinse some more. Repeat until you think they are cleaned.
3. Now lets cook our beans. In a large stock pot pour in your beans, 7 cups of water, and beef flavoring.  I prefer beef flavor more than chicken but this is totally up to your taste preferences.
4. Bring the pot-o-beans to a boil, when it comes to a good boil, place lid on pot and simmer for 3-4 hours.  As it cooks some of the water will evaporate, I usually add 2-3 more cups of water halfway through.

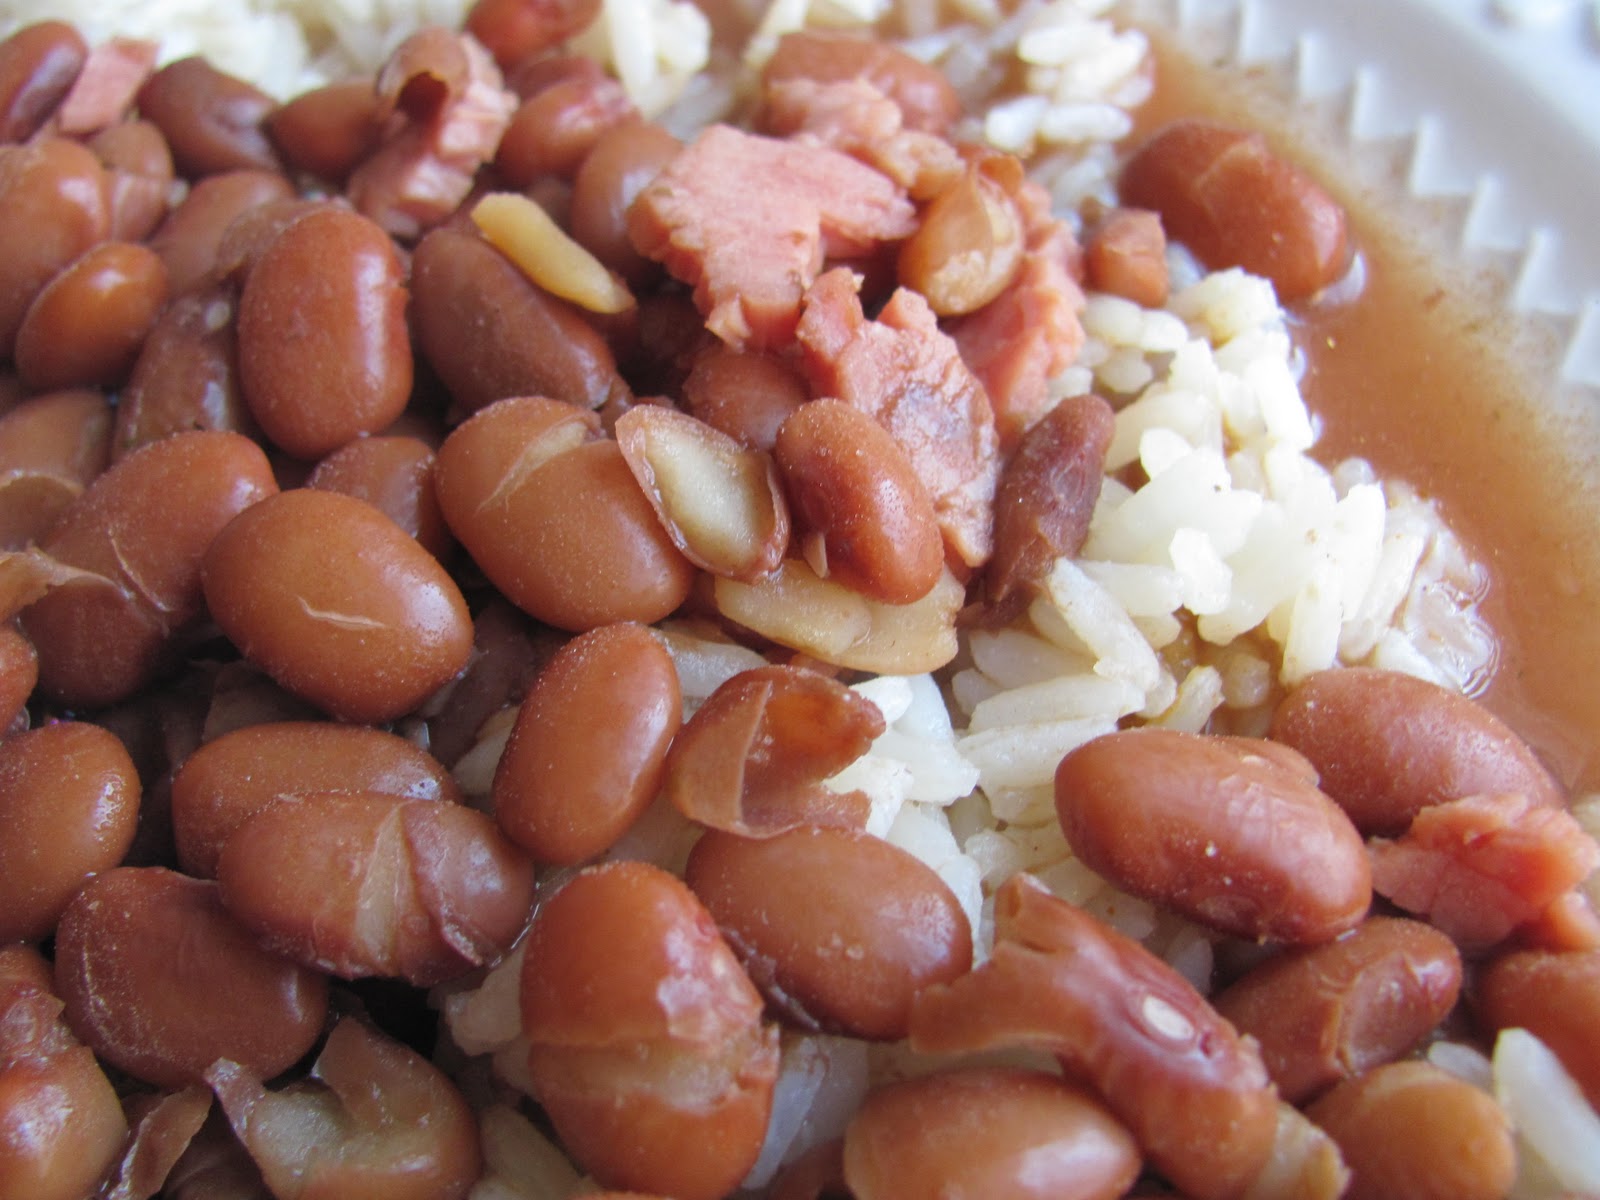
Thirty minutes before beans are finished cooking I like to cook some brown or parboiled rice.  My family loves to eat their beans over a plate of rice and if we have cheddar cheese to sprinkle on top it's even better!!!

My dear hubby was not so happy when I used to fix beans, and that was so disappointing to me because beans are such a cheap meal to add to the menu.  I finally learned it was the cornbread with the beans he did not like. When I started making rice instead to go with them and used the Knorr bouillon, he LOVED it! I mean he REALLY does. And that makes me happy!!!


LEFTOVER BEANS

I like to make a huge batch of beans and turn that into different meals through the week.  There are so many things you can make with them here are some ideas:

1. Make chili
2. With left over chili make Frito pie
3. With the left over chili, add a block of Velveeta for chili cheese dip!!!
4. Mash the beans up and put in tortillas, add your favorites, such as cheese or sour cream, roll up for quick and easy burritos.

These are just a few ideas, feel free to share what you like to make with leftover beans!!! :)


Sunday, January 16, 2011

Mama's Pound Cake


Tonight I mixed up a pound cake. And this wonderful recipe is compliments of Paula Deen.

Do you remember watching your Mom mix up a cake and anxiously awaiting the bowl......so you could lick it and the spoons clean?  My youngest was doing just that while I mixed this up....she gladly accepted it and this batter certainly met her approval.

I love how simple & basic the recipe is and it taste wonderful.  Paula would cringe but I did not use butter, I had to use margarine.  I love butter, especially when baking, but the budget did not allow real butter this week, and this still tastes great with margarine!!! :) I'm sure not as good though......


Mama's Pound Cake

Ingredients

  • 1/2 pound (2 sticks) butter, plus more for pan
  • 1/2 cup vegetable shortening
  • 3 cups sugar
  • 5 eggs
  • 3 cups all-purpose flour, plus more for pan
  • 1/2 teaspoon fine salt
  • 1/2 teaspoon baking powder
  • 1 cup milk
  • 1 teaspoon vanilla extract

Directions

Preheat oven to 350 degrees F.
With a mixer, cream butter and shortening together. Add sugar, a little at a time. Add eggs, 1 at a time, beating after each addition. Stir dry ingredients together in a bowl and add to mixer alternately with milk, starting with the flour and ending with the flour. Mix in vanilla. Pour into a greased and floured tube pan and bake for 1 to 1 1/2 hours, until a toothpick inserted in the center of the cake comes out clean.
(My Notes:  I used vegetable oil instead of shortening to insure a moist cake, it took 1 hour and 15 minutes to bake)